Pilotage information
On this page:
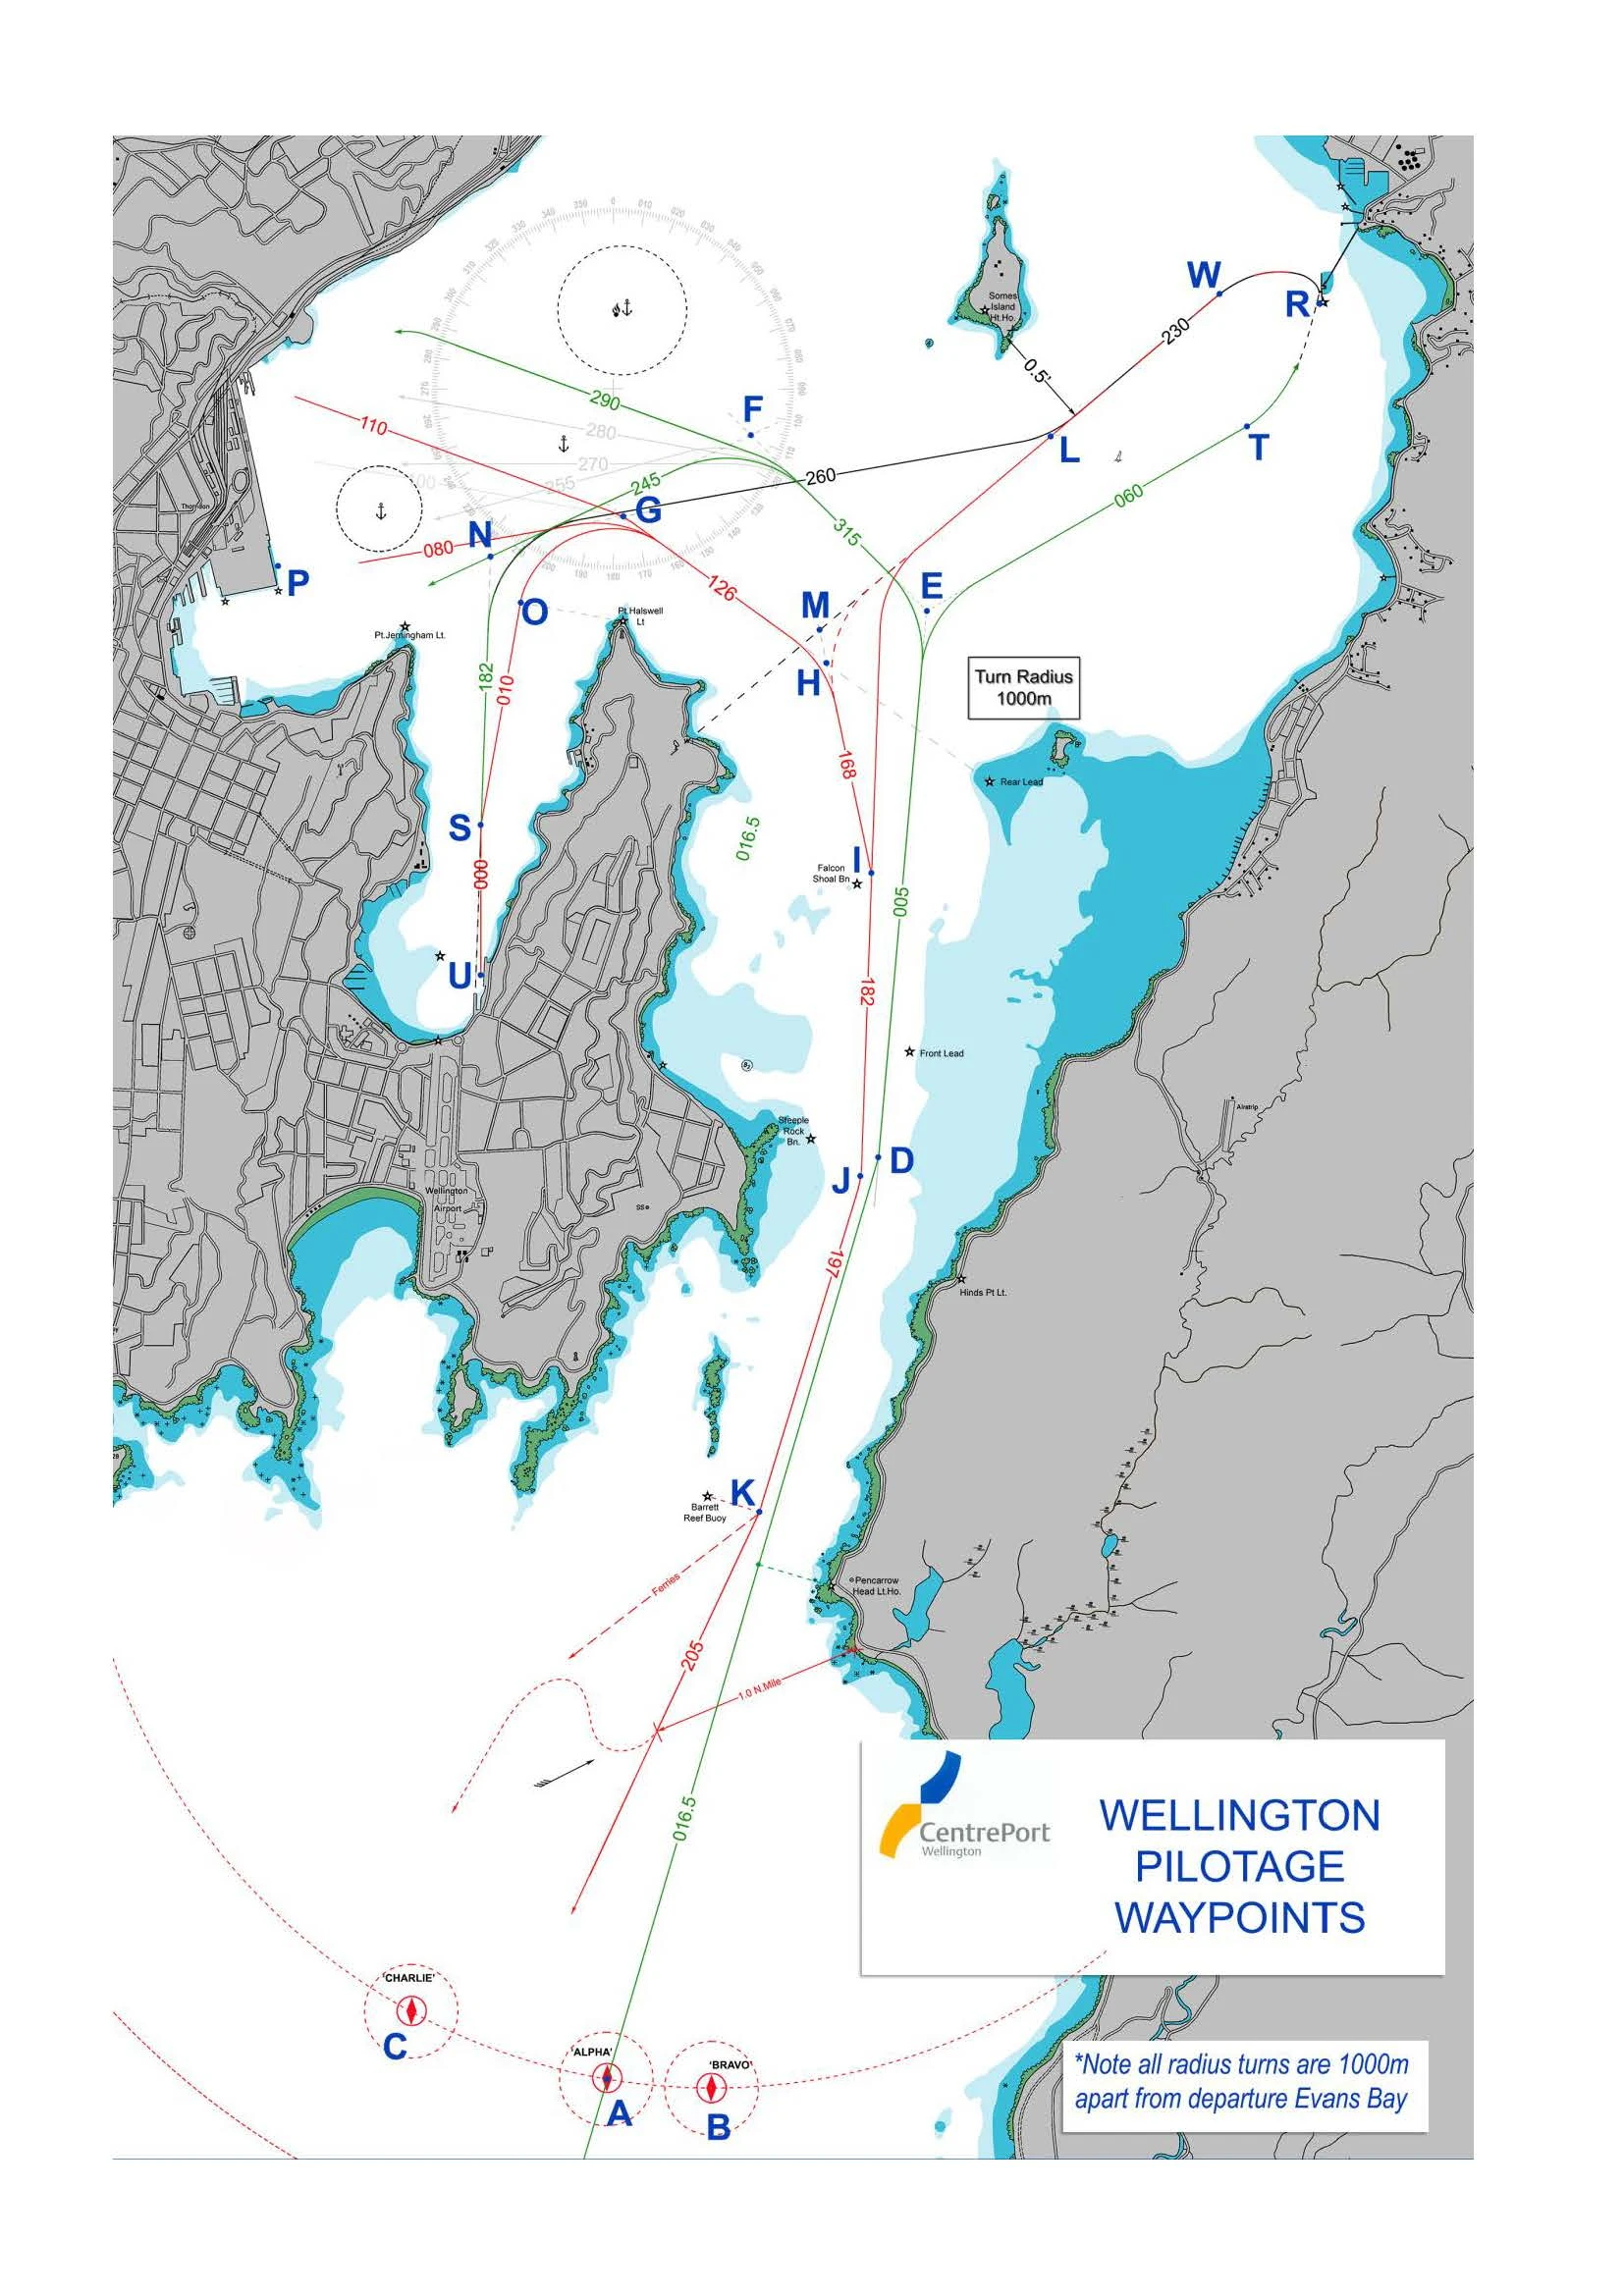
Waypoints
You can use the pilotage waypoints for Wellington Harbour to set tracks on your GPS equipment or Electronic Chart Display and Information System (ECDIS).
Note: while all care has been taken, CentrePort cannot be held responsible for the accuracy of this data.
Pilot stations |
|||
| “A” | 41 24.00’ S 174 49.43’ E | steer 016.5 | Pilot Station “Alpha” |
| “B” | 41 24.00’ S 174 50.10’ E | Pilot Station “Bravo” | |
| “C” | 41 24.00’ S 174 48.30’ E | Pilot Station “Charlie” | |
Inwards to city wharves (Main Port) |
|||
| “A” | 41 23.89’ S 174 49.47’ E | steer 016.5 | Pilot Station “Alpha” |
| “D” | 41 19.56’ S 174 51.16’ E | steer 005 | Abeam Steeple |
| “E” | 41 17.00’ S 174 51.46’ E | steer 315 | Transit Halswell/Jerningham. |
| “F” | 41 16.31’ S 174 50.53’ E | steer 264/290 | Abeam Halswell |
Outwards from city wharves (Main Port) |
|||
| “G” | 41 16.54’ S 174 49.57’ E | steer 126 | Posn. North of Halswell |
| “H” | 41 17.22’ S 174 50.82’ E | steer 168 | To pass East of Falcon Shoal |
| “I” | 41 18.26’ S 174 51.11’ E | steer 182 | Posn. Abeam Falcon Shoal Lt. |
| “J” | 41 19.70’ S 174 51.04’ E | steer 197 | Posn. Off Steeple Lt. |
| “K” | 41 21.22’ S 174 50.41’ E | steer 205 | Posn. Abeam Barrett Buoy |
Inwards to Seaview Wharf |
|||
| “A” | 41 23.89’ S 174 49.47’ E | steer 016.5 | Pilot Station “Alpha” |
| “D” | 41 19.56’ S 174 51.16’ E | steer 005 | Abeam Steeple Lt |
| “E” | 41 17.00’ S 174 51.46’ E | steer 060 | Transit Halswell/Jerningham. |
| “T” | 41 16.00’ S 174 53.60’ E | various | Approach Posn. Seaview |
| "R" | 41 15.50’ S 174 53.90’ E | Seaview Wf. | |
Outwards from Seaview Wharf |
|||
| "R" | 41 15.50’ S 174 53.90’ E | various | Posn. Seaview Wharf |
| “W” | 41 15.50’ S 174 53.28’ E | steer 230 | Departure Posn. off Seaview |
| “M” | 41 17.09’ S 174 50.78’ E | steer 168 | To pass East of Falcon Shoal |
| “I” | 41 18.26’ S 174 51.11’ E | steer 182 | Posn. Abeam Falcon Shoal |
| “J” | 41 19.70’ S 174 51.04’ E | steer 197 | Posn. Of Steeple Lt. |
| “K” | 41 21.22’ S 174 50.41’ E | steer 205 | Posn. Abeam Barrett Buoy |
Inwards to Burnham Wharf |
|||
| “A” | 41 23.89’ S 174 49.47’ E | steer 016.5 | Pilot Station “Alpha” |
| “D” | 41 19.56’ S 174 51.16’ E | steer 005 | Abeam Steeple Lt |
| “E” | 41 17.00’ S 174 51.46’ E | steer 315 | Transit Halswell/Jerningham. |
| “F” | 41 16.31’ S 174 50.53’ E | steer 264 | Abeam Halswell |
| “N” | 41 16.44’ S 174 48.85’ E | steer 187 | Course for Evans Bay |
| “S” | 41 18.50’ S 174 48.50’ E | various | Approach Posn. Burnham Wharf |
| “U” | 41 18.70’ S 174 48.69’ E | Burnham Wharf | |
Outwards from Burnham Wharf |
|||
| “U” | 41 18.70’ S 174 48.69’ E | steer 000 | Burnham Wharf |
| “S” | 41 18.00’ S 174 48.69’ E | steer 010 | Centre Evans Bay |
| “0” | 41 16.95’ S 174 48.93’ E | various | Posn. to turn out of E. Bay |
| “G” | 41 16.54’ S 174 49.57’ E | steer 126 | Posn. N. of Halswell (optional) |
| “H” | 41 17.22’ S 174 50.82’ E | steer 168 | To pass East of Falcon Shoal |
| “I” | 41 18.26’ S 174 51.11’ E | steer 182 | Posn. Abeam Falcon Shoal |
| “J” | 41 19.70’ S 174 51.04’ E | steer 197 | Posn. Of Steeple Lt |
| “K” | 41 21.22’ S 174 50.41’ E | steer 205 | Posn. Abeam Barrett Buoy |
Seaview / Burnham shift |
|||
| “R” | 41 15.50’ S 174 53.90’ E | various | Posn. Seaview Wharf |
| “W” | 41 15.50’ S 174 53.28’ E | steer 230 | Departure Posn. off Seaview |
| “L” | 41 16.17’ S 174 52.23’ E | steer 264 | Posn. South of Somes Is. |
| “N” | 41 16.44’ S 174 48.85’ E | steer 187 | Course for Evans Bay |
| “S” | 41 18.50’ S 174 48.50’ E | various | Approach Posn. Burnham Wharf |
| “U” | 41 18.70’ S 174 48.69’ E | Burnham Wharf | |
Wharf and Approach Points |
|||
| "P" | 41 16.78’ S 174 47.42’ E | Posn. Off TCW1 | |
| "Q" | 41 16.50’ S 174 48.05’ E | H. O. Anchorage | |
| "R" | 41 15.50’ S 174 53.90’ E | Posn. Seaview Wharf | |
| "S" | 41 18.50’ S 174 48.50’ E | Approach Posn. Burnham Wharf | |
| "T" | 41 16.00’ S 174 53.72’ E | Approach Posn. Seaview | |
| "U" | 41 18.70’ S 174 48.69’ E | Burnham Wharf | |
| "V" | 41 18.00’ S 174 48.69’ E | Centre Evans Bay | |
Anchorages |
|||
| 1 | 41 16.25 S 174 48.09 E | Inner Anchorage | |
| 2 | 41 16.04 S 174 48.67 E | Outer Anchorage | |
| 3 | 41 15.78 S 174 49.03 E | Outer Anchorage | |
| 4 | 41 15.50 S 174 50.00 E | Explosives Anchorage | |
| 5 | 41 16.52 S 174 48.07 E | Quarantine Anchorage | |
| 6 | 41 15.95 S 174 53.00 E | Tanker Waiting Anchorage | |
Map of pilotage waypoints
Port passage planning
The information below can help you plan your arrival and departure from Wellington Harbour.
Charts
The charts used for Wellington are:
- NZ 463 Approaches to Wellington
- NZ 4633 Wellington Harbour
- NZ 4634 Wellington Harbour entrance and plans of wharves
Four pilot boarding areas have been established at the following approximate positions:
'A' Alpha 41°24.00’ S 174 49.43’ E Steer 016.5
'B' Bravo 41°24.00’ S 174 50.10’ E
'C' Charlie 41°24.00’ S 174 48.30’ E
When about 2 nautical miles southward (or 3nm or more in southerly weather) from the charted position of Barrett’s Reef Buoy, bring the leading light beacons in line (016.5º).
Continue with the leads in line (or to the starboard side of the channel if meeting outward traffic), until Steeple Beacon is a beam.
Steer 005º with Matiu/Somes Island fine to starboard until the next course intersection point of Point Jerningham in transit with Point Halswell.
Be aware of outward tanker traffic from Seaview, which may now be on the starboard bow on this course, and whose lights easily blend with background shore lighting at night.
Alter to a course between 310º and 315º but making allowance for advance in setting the wheel-overpoint.
This course will put Mount Kaukau TV mast (41° 14.1’ S 174° 46.77’ E) ahead and Ward Island astern. When Point Halswell is abeam on this course, but again making allowance for advance, alter course for the anchorage or berths.
On any inward track at night be aware of outward ferry traffic from Lambton Harbour or the Rail Ferry terminal and any vessel outward bound from Seaview or Evans Bay, whose lights easily blend with background shore lighting.
From the general direction of the Health Officer’s anchorage, steer 080º until Point Halswell is just forward of the beam.
By night the Rear Lead would have just shown an intensified white arc followed by an intensified green arc.
By day the Rear Lead will be coming into transit with the last buildings on the shore behind the light (Bus Terminal just south of Point Arthur). Steer 126º with the Rear Lead ahead.
Vessels should adjust their tracks to keep at least 3 cables off Point Halswell, Kau Point and Point Gordon (to allow small vessels to transit this area).
Using the following transit marks, but making allowance for advance, alter course to 168º (this will be an easy turn for smaller vessels) to put the Front Lead ahead:
- between 3 nm and 1.1nm by radar from the Rear Lead,
- Steeple Rock Light in transit with Pencarrow lower light,
- or when Falcon Shoal is in transit with the Front Lead,
This course passes close to the east of Falcon Shoals and Falcon Shoal light Beacon.
When Steeple Beacon light changes from white to red at night (Falcon Shoal light Beacon will be in transit with Steeple Beacon bearing 190º and just forward of the beam), or with the Rear Lead in transit with the north part of Ward Island and with Steeple Rock in transit with Pinnacle Rock off Point Dorset by day, alter course to 182º to put Pencarrow Light ahead. This track passes midway between Steeple Beacon and the Front Lead.
When the Front and Rear Leads are nearly in transit (just inside the intensified white sector – 019º bearing) by night or when the Front Lead is in transit with Ward Island by day, alter course to 197º to the harbour entrance, keeping to the starboard side of the channel, particularly if there is any inbound traffic.
This track is approximately 1 cable to the west of the leading line and this course stays within the intensified sector of the Rear Lead.
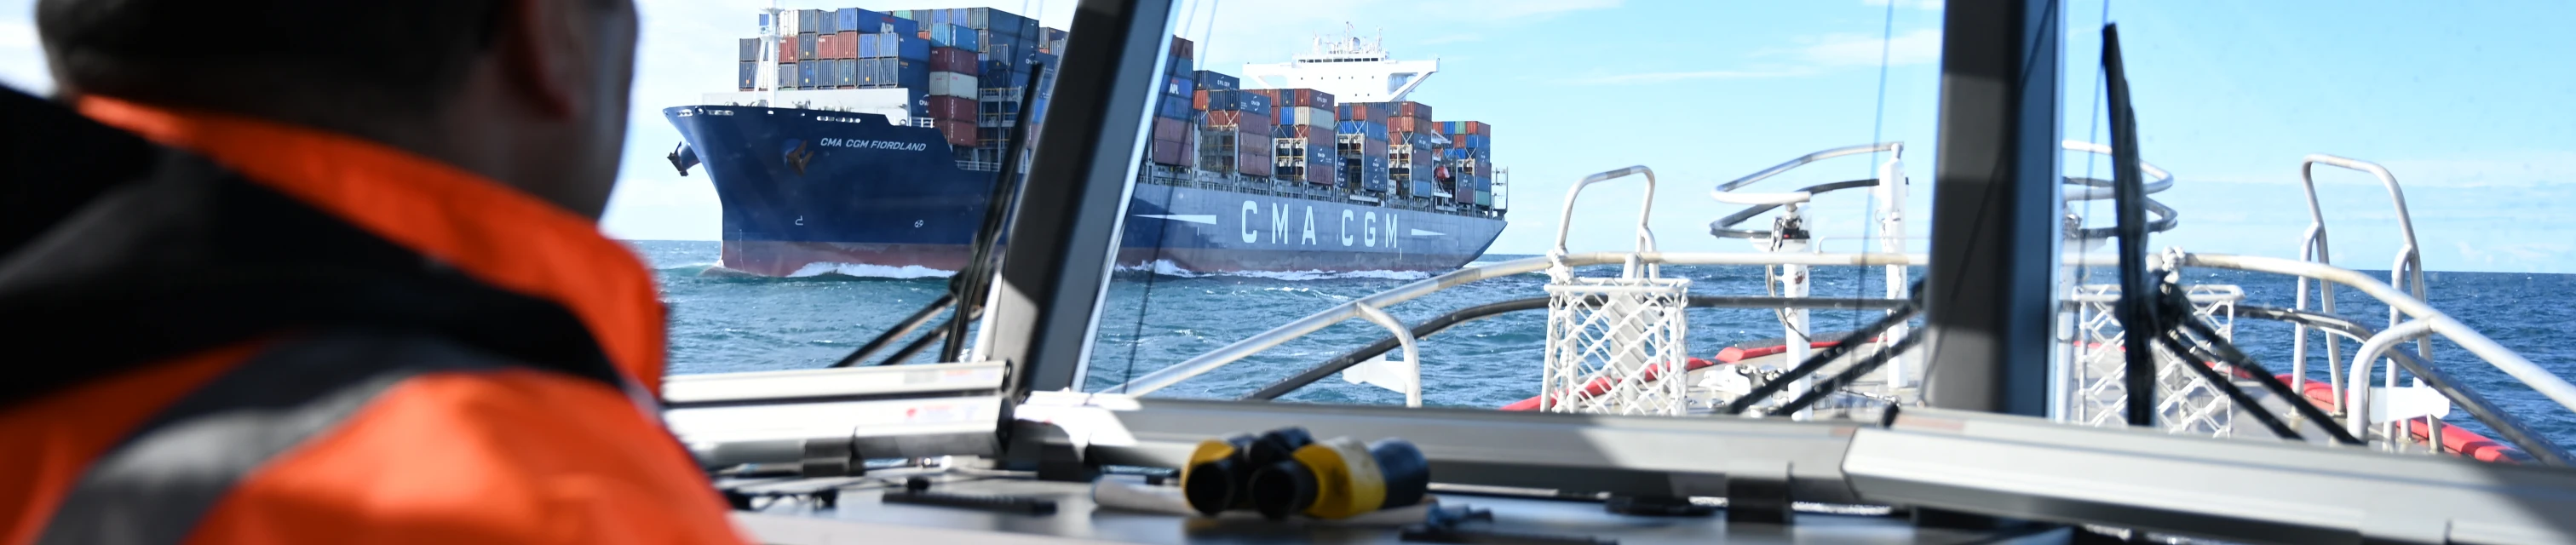
Pilots will normally board from ‘Tarakena’, a 14.6 metre Striker launch capable of 14 knots or ‘Te Haa’ an 18 metre Camarc launch capable of 26 knots. A boarding speed of approximately 9 knots is preferred but this will depend on the sea and swell conditions.
The Pilot will arrange and describe a boarding position if this should differ from the charted positions (NZ 4633). The boarding position should allow time for the Pilot to present his pilotage plan to the bridge team. Ship’s bridge teams should have the pilot card ready for presentation.
This situation will be discussed with the Master by radio and a piloting plan agreed. The boarding position and the point of commencing the lead will be advised by the Pilot.
In the above conditions, the vessel should join the leads at least 3 miles from the entrance and the Master should carefully monitor the vessel’s progress during the passage, keeping strictly to the line of the leads.